
Weapons
Everhex 0.5.23 · Updated 13 November 2026
Your tower carries up to six weapons, one on each mount. Every mount fires on its own timer. This page covers what each weapon is for, how it chooses what to shoot, and the stats that belong to it alone. For the stats every weapon shares (damage, attack speed, crits, range) see Stats.
The fourteen weapons at a glance
 CannonSingle targetFree
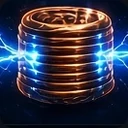 Tesla CoilChains between targets1,200 coins
 MortarSplash9,000 coins
 Frost ProjectorControl, by slowing4,000 coins
 RailgunPierces a line1,500,000 coins
 Flak CannonSplash burst700,000 coins
 Drone BaySeeks targets6,000,000 coins
 Venom SprayerDamage over time150,000 coins
 Gravity WellClumps enemies together25,000,000 coins
 Mine LayerArea denial420,000 coins
 Beam LaserRamps up on one target3,000,000 coins
 Ricochet ShredderRicochets, weaker each hop260,000 coins
 Aegis ProjectorDefensive shield12,000,000 coins
 Void LanceFinisher60,000,000 coins
Mounts
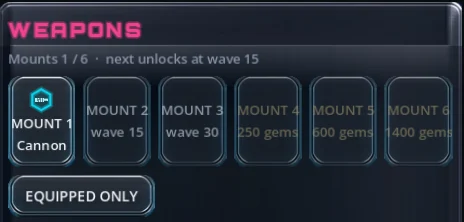
- Mount 1 is open from the start.
- Mount 2 opens when your best-ever wave reaches 15, and mount 3 at 30.
- Mounts 4, 5 and 6 cannot be earned by play. They cost 250, 600 and 1,400 gems.
Weapons are bought once with coins in the Workshop and then placed on a mount. The Cannon is free. Ascending resets the weapons you own back to the Cannon, along with the rest of the Workshop.
How weapon damage is built
A weapon's damage starts from the tower's damage (see Damage) and multiplies it:
- by the weapon's own damage factor, listed for each weapon below;
- by ×1.10 for every level of its Power line bought in the run;
- by ×1.12 for every level of its Power line bought in the Workshop;
- by its weapon perks from the perk draft (for example Rifled Barrel, +35% Cannon damage).
Because the Power levels multiply, ten in-run levels are worth ×2.59, not +100%.
A weapon's fire rate is the tower's attack speed times the weapon's own fire-rate factor, so a factor of 0.5 means half as many shots as the Cannon. No weapon fires more than 60 times a second, apart from the extra shots of the Cascade keystone.
Reach and the arena
The arena is a circle that grows with the wave: 320 units across its radius at wave 1, rising evenly to 850 at wave 30 and staying there. Enemies appear on its edge.
Each weapon reaches a share of the arena. Its own Reach line adds 4% of the arena per in-run level and 2% per Workshop level, until the weapon reaches the edge. The tower's Range stat then closes the remaining gap without ever passing the edge:
reach = arena × (1 − (1 − share) ÷ Range multiplier)
Example: the Mortar starts at 55% of the arena. With a Range multiplier of ×2 it reaches 1 − 0.45 ÷ 2 = 77.5% of the arena. Range you buy past the edge is not wasted: it becomes Long Shot damage.
Base reach, as a share of the arena
How targets are chosen
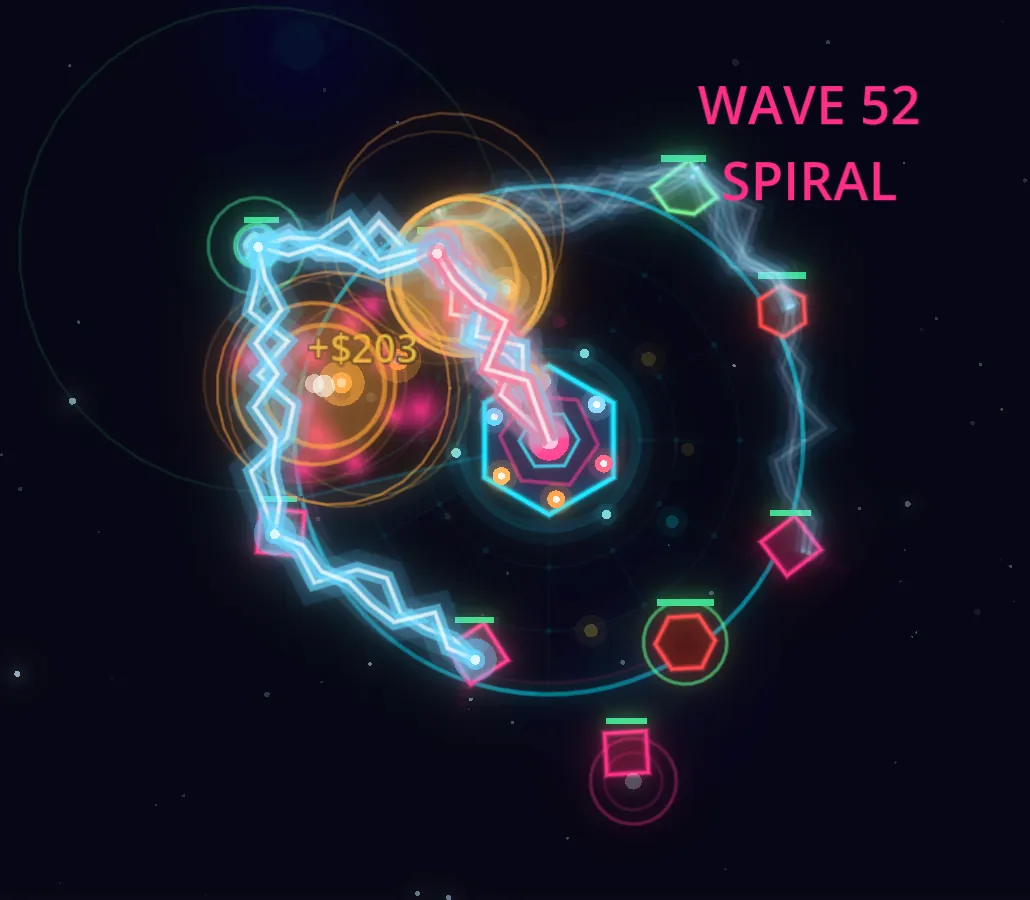
Every weapon sees the enemies inside its own reach, sorted nearest to the tower first. What each weapon does with that list is below. In Hive mode the order changes: walkers about to reach the tower come first, then nests, then everything else.
Weapons that can crit: Cannon, Tesla Coil, Mortar, Frost Projector, Railgun, Flak Cannon, Drone Bay, Beam Laser, Ricochet Shredder and Void Lance. Venom poison, the Gravity Well and the Mine Layer never crit, and the Aegis Projector deals no damage of its own.
Cannon
Role: single target. Strong against armoured and warded enemies, weak against massed waves.
Targeting: fires one homing bullet at each of the nearest enemies in reach. The number of bullets is its target count: 1, plus Multi-Shot (+1 per 20 levels), plus each Chain Shot perk (+1), plus Eye of the Storm (+1) if an allocated cluster carries it. Each bullet goes to a different enemy and rolls its own crit. If fewer enemies are in reach than the target count, the extra bullets are simply not fired; they never double up on one enemy.
- Damage factor ×1.0, fire-rate factor ×1.0, reach 85% of the arena. Free.
- The Cannon is the only weapon that reads the target count, so Multi-Shot, Chain Shot and Eye of the Storm do nothing without a Cannon mounted.
- It is also the only weapon that fires projectiles, so Projectile Speed (+4% per level) affects only its bullets.
- Lines: Cannon Power, Cannon Reach.
Tesla Coil
Role: chains between targets. Strong against spread waves, weak against lone elites.
Targeting: an instant arc hits the nearest enemy in reach, then jumps to the closest enemy it has not struck yet within 165 units of the last one, until it runs out of links or of enemies close enough. Each link deals the first hit's damage times the falloff raised to the link's position, so with the base 0.72 falloff the second enemy takes 72% and the third 52%. One crit roll covers the whole arc.
- Damage ×0.72, fire rate ×0.80, reach 70%. Costs 1,200 coins.
- Arc length: 3 enemies, +1 per Tesla Chain level, +2 per Arc Cascade perk, +4 from Storm Core, never more than 12.
- Falloff: 0.72. Superconductor raises it to 0.88; Storm Core makes it 1.0, so the arc never loses power.
- Lines: Tesla Power, Tesla Chain, Tesla Reach.
Mortar
Role: splash. Strong against massed waves, weak against armour.
Targeting: looks at the 8 nearest enemies in reach and aims at whichever has the most enemies within its blast radius. The impact point is fixed when it fires, so enemies can walk out of it. Everything inside the blast takes full damage.
- Damage ×2.20, fire rate ×0.38, reach 55%. Costs 9,000 coins.
- Blast radius: 72 units, +10% per Blast Radius level, ×1.5 per Cluster Munitions perk.
- The blast stops growing at 18% of the full-size arena (153 units). Each Blast Radius level past that ceiling adds +2% damage instead, up to +20% in total.
- Lines: Mortar Power, Blast Radius, Mortar Reach.
Frost Projector
Role: control, by slowing. Strong against massed waves, useless against warded enemies, which cannot be slowed.
Targeting: sprays a cone (about 31 degrees either side of its aim) in whichever direction, among the 8 nearest enemies, catches the most enemies in reach. Everything in the cone is slowed for 2.2 seconds and takes a small hit.
- Damage ×0.30, fire rate ×0.70, reach 60%. Costs 4,000 coins.
- From its base reach, Frost already touches the Long Shot band (enemies at least 60% of the arena radius out), so Frost and Brittle work on the enemies a Long Shot build is hitting.
- Slow: 35% of speed removed, +3% per Chill Depth level, +12% per Deep Freeze perk, never more than 90%. When two slows overlap, the strongest one applies; they do not add.
- Its real value is the Brittle perk, which is only offered while a Frost Projector is mounted.
- Lines: Frost Power, Chill Depth, Frost Reach.
Railgun
Role: pierces a line. Strong against columns and armour, weak against enemies that surround the tower.
Targeting: aims at the nearest enemy in reach and hits every enemy along that straight line out from the tower, nearest first, up to its pierce count. One crit roll covers the shot.
- Damage ×3.40, fire rate ×0.22, reach 90%. Costs 1,500,000 coins.
- Pierce: 3 enemies, +1 per Pierce level, +2 per Overpenetration perk.
- Lines: Railgun Power, Pierce, Railgun Reach.
Flak Cannon
Role: splash burst. Strong against massed waves, weak against lone elites.
Targeting: its shells burst at 72% of its reach. It tries the direction of each of the 8 nearest enemies and fires the way that puts the most enemies inside the burst.
- Damage ×1.10, fire rate ×0.62, reach 55%. Costs 700,000 coins.
- Burst radius: 70 units, +10% per Burst Radius level, ×1.5 per Proximity Fuse perk, with the same 153-unit ceiling and the same +2% damage per level past it (up to +20%) as the Mortar.
- Lines: Flak Power, Burst Radius, Flak Reach.
Drone Bay
Role: seeks targets. Strong against warded and scattered enemies, weak against tight clumps.
Targeting: the mount does not shoot. It keeps drones circling the tower at 42% of its reach, and each drone fires on its own at whichever enemy is nearest to the drone, not to the tower. Each drone shot rolls its own crit.
- Damage ×0.42 per drone shot, fire rate ×1.70, reach 70%. Costs 6,000,000 coins.
- Drones: 2, +1 per Extra Drone level, +2 per Swarm Protocol perk, never more than 8.
- Lines: Drone Power, Extra Drone, Drone Reach.
Venom Sprayer
Role: damage over time. Strong against massed waves, useless against warded enemies, which shed poison.
Targeting: sprays a cone (the same width as Frost's) toward the nearest enemy and poisons everything in it. Each hit adds one poison stack, up to the stack cap. Every half second a poisoned enemy takes the poison's damage times its stacks, and keeps taking it after the sprayer stops. A new hit keeps whichever poison damage is higher. Poison never crits.
- Damage ×0.26 per stack, fire rate ×1.15, reach 55%. Costs 150,000 coins.
- Stack cap: 4, +1 per Stack Cap level, +3 per Necrotoxin perk.
- Lines: Venom Power, Stack Cap, Venom Reach.
Gravity Well
Role: an enabler that clumps enemies together for your splash weapons. Strong beside splash, weak on its own.
Targeting: the well never forms on the tower's doorstep. It picks a spot between 45% of its own reach and 85% of the shortest reach among your damage weapons, so the clump lands where the rest of your loadout can shoot it. Among up to 8 candidates in that band it chooses the one with the most enemies inside the well's radius. The well pulls for 1.2 seconds and deals very little damage, which never crits.
- Damage ×0.15, fire rate ×0.35, reach 40%. Costs 25,000,000 coins.
- Well radius: 190 units, +8% per Well Radius level, ×1.4 per Singularity perk, never more than half the arena.
- Pull: 55, +12% per Pull Strength level, ×1.6 per Event Horizon perk.
- Lines: Pull Strength, Well Radius, Gravity Reach.
Mine Layer
Role: area denial. Strong against columns and breaches, weak against enemies that surround the tower.
Targeting: it does not aim. Each shot drops up to 6 mines across the outer band of the arena, from 85% to 100% of its radius, filling the outermost part first. A mine explodes the moment an enemy touches it, hitting everything in the blast. A mine nobody touches for 20 seconds moves out to a new spot near the edge. Mines never crit.
- Damage ×2.60 per mine, fire rate ×0.40, reach 40%. Costs 420,000 coins.
- Mines on the field: 24, +3 per Mines Held level, +12 per Minefield perk, never more than 120. The layer stops firing while the field is full.
- Blast: 150 units, held under the same area ceiling as the Mortar.
- Lines: Mine Power, Mines Held, Mine Reach.
Beam Laser
Role: ramps up on one target. Strong against armour and bosses, weak against massed waves.
Targeting: locks onto the nearest enemy in reach and stays on it until it dies or leaves reach, or until another enemy comes much closer to the tower (nearer than 60% of the locked target's distance). Every shot on the same target adds the ramp rate to its damage multiplier, up to ×6. Switching targets resets the ramp to ×1.
- Damage ×0.80, fire rate ×1.00, reach 90%. Costs 3,000,000 coins.
- Ramp rate: +0.55 per shot, +15% per Ramp Rate level, ×1.6 per Focusing Array perk.
- Lines: Beam Power, Ramp Rate, Beam Reach.
Ricochet Shredder
Role: ricochets, weaker each hop. Strong against tight crowds, weak against thin fields.
Targeting: a blade hits the nearest enemy in reach, then hops to the closest enemy it has not hit within 190 units, and so on. Each hop deals 72% of the hop before it. One crit roll covers the whole chain.
- Damage ×1.30, fire rate ×0.70, reach 70%. Costs 260,000 coins.
- Enemies hit per blade: 4, +1 per Bounces level, +3 per Serrated perk, never more than 12.
- Lines: Shredder Power, Bounces, Shredder Reach.
Aegis Projector
Role: defensive shield. Strong beside damage weapons, weak on its own.
Targeting: none. Each shot tops up a shield on the tower by 6% of the shield's size. The shield absorbs hits before your health does, after Armour has reduced them. Whatever it absorbs is partly thrown back at the enemy that hit you.
- No damage of its own, fire rate ×0.45, reach 40%. Costs 12,000,000 coins.
- Shield size: 25% of the tower's max health, +12% per Shield Strength level, ×1.5 per Hardlight perk.
- Reflect: 20% of what the shield absorbs, +4% per Reflect level, +15% per Retaliation perk, never more than 85%. Each reflected hit also removes 0.4% of the attacker's max health.
- An enemy killed by the reflect (or by Thorns) at the tower still pays like any kill.
- Lines: Shield Strength, Reflect, Aegis Reach.
Void Lance
Role: a finisher that keeps working at any depth.
Targeting: looks through the enemies in reach, nearest first, for one it can finish: an enemy at or below its finisher threshold (a share of max health) and with no more health left than 24 times this shot's damage. That enemy is destroyed outright. If there is none, the lance simply hits the nearest enemy for its normal damage.
- Damage ×3.20, fire rate ×0.50, reach 85%. Costs 60,000,000 coins.
- Finisher threshold: 8% of max health, +1% per Finisher Threshold level, +6% per Event Threshold perk, never more than 45%. The line was called Execute Threshold until 0.5.23; the new name keeps it apart from the Execute upgrade.
- Because the finish also depends on the lance's own damage, Void Power still matters.
- Lines: Void Power, Finisher Threshold, Void Reach.
Pairings that work
These follow from how the weapons target. They are not a ranking.
- Gravity Well with Mortar, Flak or Tesla: the well gathers a clump inside your other weapons' reach, and splash and chains hit the whole clump.
- Cannon with Multi-Shot: only the Cannon uses extra targets.
- Frost Projector with Brittle: Brittle raises every weapon's damage against chilled enemies, not just Frost's.
- Beam Laser for bosses: it ramps up to ×6 on a single target that lives long enough.
- Void Lance for deep waves: its finisher threshold is a share of the enemy's health.
- Aegis Projector beside damage weapons: it keeps the tower alive while they work, but kills nothing by itself until enemies reach you.