
Stats
Everhex 0.5.23 · Updated 13 November 2026
Every tower stat, what it does and how big it gets. In-run lines are bought with cash during a run and reset when it ends; each Workshop line raises the level its in-run line starts at (see Workshop). The Constellation, jewels, perks and keystones add on top.
Prices in a run: each line's next level costs its base price × 1.2 for every level the line already has, Workshop levels included. A line you have raised high in the Workshop is therefore dearer to raise further during the run.
 Damage+1 damage a level
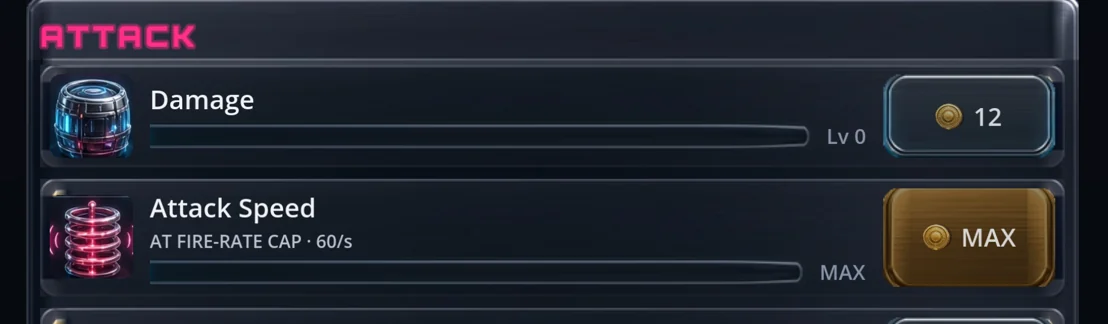
 Attack Speed+5% a level, capped
 Crit Chance5% + 1% a level
 Crit Damage×1.5 + 0.1 a level
 Multi-ShotCannon only
 Range+3% a level
 Overcharge3× fire, 2× damage
 Armourcuts damage taken
 Thorns8% back a level
 Leechheals on kill
 Health+20% a level
 Health RegenHP a second
 Execute+6% under 30% HP
 Frost Fieldslow, up to 30%
 Fortunejewel find
 Projectile SpeedCannon bullets
How bonuses stack
One rule explains almost every number in the game.
- The same stat from the Constellation adds. Web nodes, Deep Field nodes, socketed jewels and allocated cluster jewels that all give, say, Damage are summed into one percentage. That total becomes one multiplier: ×(1 + total ÷ 100).
- Everything else multiplies. That Constellation multiplier, your upgrade level, your perks, achievement bonuses, keystones and Overcharge are separate factors multiplied together. Different stats multiply each other too: a hit is damage × crit damage × any other bonus that applies.
Example: the web gives +300% damage and your jewels give +100% damage. Together that is +400%, a ×5 multiplier, not ×4 × ×2 = ×8. If you also have ×3 crit damage, a crit from that tower deals ×15.
Same stat adds, different stats multiply
What this means for choosing jewels and clusters: a bonus is worth most on the stat whose total is lowest. Adding +100% to a stat sitting at +100% takes it from ×2 to ×3, half as much again. The same +100% on a stat already at +1,000% takes ×11 to ×12, about 9% more.
Damage
- Tower damage = (1 + Damage level) × your other damage multipliers. Each level adds +1 to the base, so level 70 is ×71.
- The other multipliers: Heavy Rounds perks (×1.25 each), achievement bonuses, the Constellation's Damage total, the Overload Core keystone (×1.6), the Glass Core rim keystone (×2), Patience once its silence ends (×1.6), and Overcharge while it runs.
- Each weapon then multiplies tower damage by its own factor and Power levels (see Weapons).
- Base in-run price: 10 cash.
Worked example: Damage level 70 (×71) and +3,000% damage from the Constellation (×31) give ×71 × 31 = ×2,201.
How one hit's damage is built
- 1Base1 + Damage levellevel 70 gives ×71
- ×Constellation×(1 + total ÷ 100)web, Deep Field, jewels and clusters summed: +3,000% gives ×31
- ×Perks, keystonesHeavy Rounds ×1.25 eachachievements, Overload Core ×1.6, Glass Core ×2, Patience ×1.6, Overcharge while it runs
- ×Weapondamage factor × Power×1.10 per in-run Power level, ×1.12 per Workshop level
- ×Critcrit damage × (1 + 0.5 × tiers)only on a crit; tiers come from crit chance past 100%
- ×Long Shot1 + 0.5 × overreachdirect hits at least 60% of the arena radius away
How the run's rows show it: the Damage, Crit Damage, Health, Cash Bonus, Range, Charge Rate, Fortune and Projectile Speed rows each carry a second line such as "x71 from levels · x2,201 with all bonuses · next level +1.4%". The first number is what the line's own levels multiply the stat by. The second is the stat's whole multiplier over its bare base: levels, Constellation, jewels, perks and keystones together, leaving out Overcharge while it runs and Patience during its silence. The third is what one more level adds. A row at MAX leaves the next level out. The worked example above is exactly what the Damage row reads.
Attack Speed and the 60 shots a second cap
- Attack speed = 1.05 to the power of your level, × Overclock perks (×1.15 each), × achievement bonuses, × the Constellation's Fire Rate total. Each level is +5%, and the levels compound.
- A weapon's shots per second = attack speed × its fire-rate factor (see Weapons).
- Base in-run price: 5 cash.
The cap. The battle runs in fixed steps of 1/60 of a second, and each weapon can fire at most once per step, so no weapon fires more than 60 times a second of game time. After each shot the weapon's timer starts again from zero, so below the cap a weapon fires every whole number of steps: 60, 30, 20, 15 and so on shots a second. A weapon on paper at 45 shots a second really fires 30.
The fire-rate cap: paper rate against real shots
- The Attack Speed row reads MAX (AT FIRE-RATE CAP · 60/s) once your slowest mounted weapon fires every step. Perks count toward this; the temporary boosts of Overcharge and Overdrive do not.
- So Attack Speed stays worth buying while any mounted weapon is still under 60 a second. Past that, put the money into damage or crits.
- The Cascade keystone is the exception: its extra shots come on top of the cap.
- In the Workshop the line stops selling once every weapon you own would start a run at the cap.
Crit Chance
- Crit chance = (5% + 1% per level) × achievement bonuses × the Constellation's Crit Chance total. The Constellation bonus is a percentage of your chance, not extra points: +100% Crit Chance doubles it.
- Every shot rolls once. A multi-target shot (a Tesla arc, a Railgun line, a Shredder chain, a blast) shares one roll; each Cannon bullet and each drone shot rolls on its own.
- Base in-run price: 4 cash.
Super Crit
Crit chance stops at 100%, but nothing past 100% is wasted: it becomes super crits.
- Take your chance past 100%. Each whole 100% is one super tier that every crit gets. The leftover part is the chance of one more tier on that crit.
- Each super tier adds +0.5 to a multiplier on your crit damage: a crit deals damage × crit damage × (1 + 0.5 × tiers).
Worked example: 340% crit chance and crit damage of ×10. Every shot crits. 240% is past the cap, so every crit has 2 super tiers and 40% of them have a third. A 2-tier crit deals ×10 × 2 = ×20; a 3-tier crit deals ×10 × 2.5 = ×25. The game writes this as "340% · every crit is SUPER ×2 · 40% for ×2.5".

Crit Damage
- The line was called Crit Factor until 0.5.23; it is Crit Damage everywhere now, in a run and in the Workshop.
- Crit damage = (1.5 + 0.1 per level) × achievement bonuses × the Constellation's Crit Damage total.
- It is what a crit multiplies damage by, before super tiers.
- Base in-run price: 10 cash.
Example: Crit Damage level 50 gives 1.5 + 5 = 6.5. With +200% Crit Damage from the Constellation that becomes 6.5 × 3 = ×19.5 per crit.
Multi-Shot (Cannon only)
- +1 Cannon target for every 20 levels; the line says so: "+1 Cannon target every 20 levels". The row shows your progress toward the next target as a fraction, such as +0.6.
- Only the Cannon reads targets. With no Cannon mounted, the line reads "no effect: needs the Cannon", keeps its level and stops selling, in the run and in the Workshop.
- Each extra target is a different enemy, nearest first. With 4 targets and 1 enemy left in reach, the Cannon fires 1 bullet, not 4.
- The Chain Shot perk ("+1 Cannon target per shot") adds +1 target too, and is only offered with a Cannon mounted.
- Base in-run price: 14 cash.
Range
- Range multiplier = 1.03 to the power of your level (+3% a level, compounding), × Long Barrel perks (×1.10 each), × achievement bonuses, × the Constellation's Range total, × 0.62 with the Overload Core keystone.
- It multiplies every weapon's reach the way Weapons describes, and never pushes a weapon past the arena edge.
- The Range line has to be unlocked once in the Workshop for 40 coins before it appears.
- Base in-run price: 8 cash.
Long Shot
Range past the arena edge turns into damage on far-away hits.
- Overreach = the weapon's reach share (at most 100%) × your Range multiplier − 1. It is zero until that product passes the edge.
- A hit on an enemy at least 60% of the arena radius away from the tower deals × (1 + 0.5 × overreach).
- It counts on the direct hit only. For a blast (Mortar, Flak, Gravity Well, mines), only the enemy nearest the centre gets it, not the splash.
- It is applied to the final hit after the crit. Since every bonus here multiplies, the order makes no difference.
- The battle screen shows the Long Shot bonus of your widest-reaching weapon as a percentage.
Worked example: the Cannon's share is 85%. With a Range multiplier of ×5, overreach = 0.85 × 5 − 1 = 3.25, so far hits deal × (1 + 0.5 × 3.25) = ×2.625, shown as +163%. A readout of +13,903% means far hits deal about ×140.

Overcharge
- The gauge fills as you kill. Clearing a whole wave adds 20% × your charge multiplier, shared out across that wave's enemies, so at ×1 it takes five waves to fill.
- Killing a boss adds 50% × your charge multiplier (not in a Rift).
- Charge multiplier = the Constellation's Overcharge Rate total × the Charge Rate line (+3% a level) × 1.75 with the Resonance keystone, halved by the OVERCHARGE rim keystone.
- Spending a full gauge starts a burst that lasts for one wave's worth of enemies (the size of the current wave when you press it): every kill, and every enemy that reaches the tower, uses one up. During the burst weapons fire 3× as often (still capped at 60 a second) and deal 2× damage.
- The OVERCHARGE rim keystone doubles the burst's damage again but halves how fast the gauge fills.
- In Siege, a full gauge is spent as Vent instead (see Siege).
Overcharge surplus
Once your charge rate is high enough that a single wave refills the gauge, the burst is effectively always on, and extra Overcharge Rate would buy nothing. So the extra becomes burst damage.
- Fill = 0.20 × your charge multiplier.
- If fill is above 1, the burst's damage is multiplied by (1 + 0.5 × ln(fill)), on top of the normal ×2.
- It is logarithmic on purpose: every doubling of fill adds the same +35 points. Fill 2 gives +35%, fill 4 gives +69%, fill 10 gives +115%.
- It does not apply in Siege.
Worked example: Charge Rate level 70 (×3.1) and +1,000% Overcharge Rate from the Constellation (×11) give fill = 0.20 × 11 × 3.1 = 6.82, so the surplus is +96%. One more Charge Rate level adds only about +0.5 points, and a jewel adding +100% Overcharge Rate on top of +1,000% adds about +4 points. That is why the surplus seems to barely move.
Overcharge surplus: +0.5 × ln(fill)
Armour
- Damage taken is cut by 1 − 50 ÷ (50 + 2 × level). It never reaches 100%.
- Level 10 cuts 29%, level 25 cuts 50%, level 50 cuts 67%, level 100 cuts 80%.
- It applies to enemies reaching the tower and to Siege shells. It does not reduce a Volatile enemy's death blast.
- Base in-run price: 8 cash.
Armour: damage cut by level
Thorns
- When an enemy reaches the tower, it takes back 8% per level of the damage it brought (measured before Armour). There is no cap.
- It cannot reach Siege besiegers, which shell you from range.
- An enemy killed by Thorns at the tower pays like any other kill.
- Base in-run price: 9 cash.
Leech
- Every kill heals 0.15% of max health per level. Level 20 heals 3% a kill.
- Base in-run price: 10 cash.
Health
- Max health = 25 × 1.20 to the power of your level, × achievement bonuses, × the Constellation's Tower HP total. Each level is +20%, compounding.
- The Glass Core rim keystone sets it to exactly 1.
- Base in-run price: 10 cash.
Health Regen
- Regen per second = 0.5 per level + 1 per Nanobots perk + the Constellation's flat regen + 0.2% of your max health.
- The 0.2% part does not grow with the line; it is what keeps regen useful once health is large.
- Base in-run price: 5 cash.
Execute
- +6% damage per level against enemies at or below 30% of their max health.
- It is a separate multiplier, so it works with every weapon. It is not the Void Lance's Finisher Threshold (called Execute Threshold before 0.5.23), which is its own stat.
- Base in-run price: 10 cash.
Brittle
- Brittle is a perk: chilled enemies take +30% damage. Each Brittle you take adds another +30%.
- It applies to damage from every weapon, splash and poison included, not only Frost.
- An enemy is chilled while it is slowed by the Frost Projector's cone or by the Frost Field line.
- Warded enemies cannot be chilled, so Brittle never applies to them.
- The card is only offered while a Frost Projector is mounted.
Frost Field
- Enemies inside your widest weapon reach are slowed by 2% per level, up to 30% at level 15. The line stops selling there.
- It does not add to the Frost Projector's slow. The strongest slow on an enemy is the one that applies.
- Because it chills, Frost Field also turns on Brittle for every enemy inside that reach.
- Base in-run price: 9 cash.
The other lines
- Cash Bonus: +10% cash per kill per level. In-run only; there is no Workshop line for it.
- Charge Rate: +3% Overcharge gain per level (see Overcharge).
- Fortune: +2% jewel drop chance per level, up to +60% at level 30.
- Projectile Speed: +4% bullet speed per level. Only the Cannon fires bullets.
The order of a hit
For anyone checking the maths, one hit is worked out like this:
- the weapon's damage, × the crit multiplier if it crit;
- × Long Shot, if it is a far direct hit;
- × Brittle, if the enemy is chilled;
- × Execute, if the enemy is at or below 30% health;
- then the enemy's own defences: a Siege besieger that has dug in takes 45% less, a Shielder's plate absorbs damage first, and an Armored enemy removes a flat amount from each hit, though at least 12% of the hit always gets through.
Flat armour per hit is why many small hits do badly against Armored enemies and one big hit does well.