
Constellation
Everhex 0.5.23 · Updated 13 November 2026
The Constellation is a web of permanent stat nodes, bought with cores. Unlike the Workshop it is never reset by Ascension. Past its edge lies the Deep Field, which never ends. Jewels and cluster jewels sit in its sockets and change what the nodes around them are worth.
The web
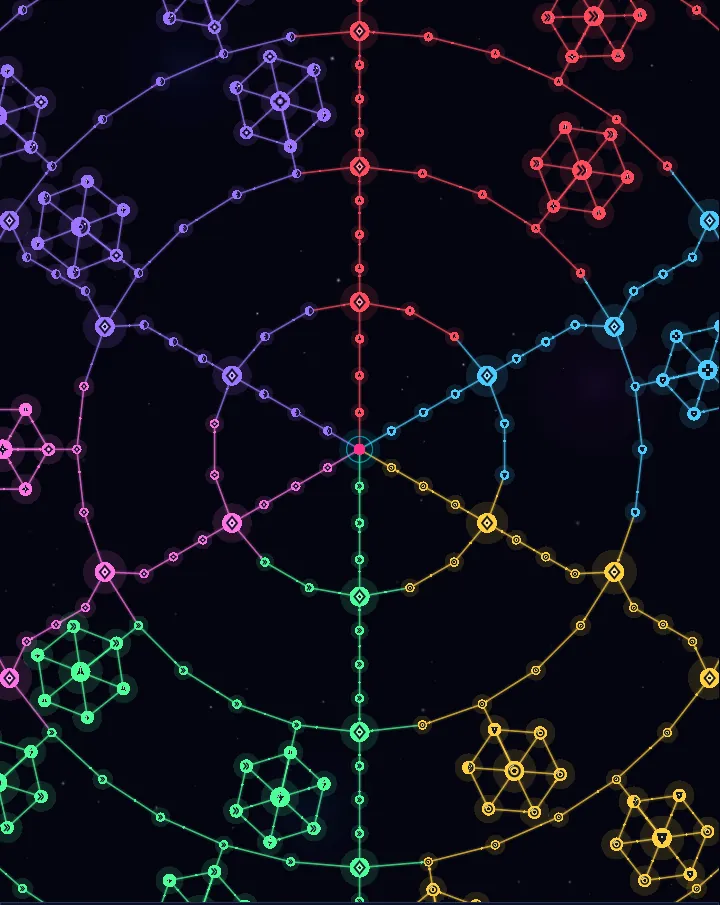
- The first map, The Web, has 453 nodes to buy, around a free centre.
- Four rings of path nodes (18, 28, 38 and 48 nodes), each joined all the way round, and six spokes running out from the centre across every ring.
- Clusters hang off the rings: a notable ringed by six minors, which you can enter and take in part.
- A jewel socket sits wherever a spoke crosses a ring: 24 in all.
- A keystone sits at the outer end of each spoke.
- You can buy any node that touches a node you own, or touches the centre. Because the rings loop, there is usually more than one way to reach a node.
The six arms each lean toward one stat, and their clusters draw from a small pool:
- Ordnance: Damage (clusters: Damage, Crit Damage, Fire Rate).
- Bulwark: Tower HP (clusters: Tower HP, Regen, Range).
- Avarice: Cash (clusters: Cash, Range, Tower HP).
- Velocity: Fire Rate (clusters: Fire Rate, Damage, Overcharge Rate).
- Ruin: Crit Chance (clusters: Crit Chance, Crit Damage, Damage).
- Aether: Range (clusters: Range, Overcharge Rate, Crit Chance).
Node values and costs
Nodes are worth more, and cost more, the further out their ring is. Costs are in cores.
- Ring 1 (innermost): path +1.1%, minor +3%, notable +11%. Path and minor cost 1, notable 3.
- Ring 2: path +1.7%, minor +4.65%, notable +17.05%. Path and minor cost 2, notable 6.
- Ring 3: path +2.6%, minor +7.2%, notable +26.4%. Path and minor cost 5, notable 15.
- Ring 4: path +4.1%, minor +11.2%, notable +41%. Path and minor cost 10, notable 30.
- Jewel sockets and keystones cost 30. A socket gives no stat by itself.
- Regen nodes give a flat amount instead: 6% of the listed figure in HP per second (a ring 1 minor gives +0.18 HP/s).
Every node's percentage goes into its stat's Constellation total. See how node bonuses combine.
Refunds and respec
- You can give back a single node for its full cost, as long as everything else you own still connects to the centre without it.
- RESPEC ALL gives back every core spent on the map, for free. Socketed jewels go back to your bag.
- The Deep Field has its own free respec.
Keystones
Each arm's keystone gives +26.4% of the arm's stat and changes how the tower plays.
- Overload Core (Ordnance): damage ×1.6, but all range ×0.62.
- Second Wind (Bulwark): once per run the tower survives a lethal hit and comes back at half health.
- Compound Interest (Avarice): kill cash +4% for every wave survived this run, adding up and never resetting during the run.
- Overdrive (Velocity): fire rate climbs +3.5% each second a wave is running, up to ×1.9, and resets between waves. Time with the game paused (or a draft open) does not count.
- Cascade (Ruin): a crit has a 35% chance to fire the same weapon again at once, up to 3 times in a row.
- Resonance (Aether): the Overcharge gauge fills 1.75× as fast.
Rim keystones
Outside the web is a short ring of four more keystones. They are not bought with cores and are not part of the 453. Each one is a trade: a gain and a price, both paid in the same run.
- You can take at most two.
- They are free to take and free to give back, but only between runs. They lock while a run exists, including a saved run you have not finished.
- GLASS CORE: damage ×2, but the tower has 1 health, so a single leak ends the run.
- OVERCHARGE: Overcharge bursts deal twice the damage, but the gauge fills half as fast.
- WARD-BOUND: at the start of every wave the tower gets a ward worth 40% of its max health that soaks hits before health, but nothing you fire can crit.
- PATIENCE: the tower is silent for the first 3 seconds of each wave, then deals +60% damage for the rest of it.
Maps
The Constellation comes in four shapes. Pick one from MAPS on the Constellation screen.
- The Web: the classic six-arm web, a balanced start.
- Four Winds: four houses, bridged only at the edges, so a pure build stays pure.
- The Weave: a diamond weave cut through with channels.
- The Descent: a double helix. It opens when you clear a Rift at Blaze danger or higher (danger 12 and up), and it is never sold.
- Every map has the same 24 jewel sockets and 6 keystones, and its nodes take their stats and costs from the Web's own nodes of the same kind. The node count differs from map to map; each map's card shows it.
- The four rim keystones are on every map.
- Switching maps is a free respec: every core you spent comes back to be spent on the new shape. You can only switch between runs.
The Deep Field
The Deep Field opens once you own 453 nodes of the first stage, which is the whole Web. Owning it also opens Siege and Hive. Until then, the game shows your count wherever it names the gate, for example "complete the Constellation (120 / 453)". It continues outward in the same six arms and never ends.
- Each deep ring has 58 path nodes on the first ring and 10 more on every ring after, plus three spoke nodes per arm and clusters on every fourth ring node.
- Costs grow ×1.6 a ring and values grow ×1.15 a ring, so each ring gives a little less per core than the one before, forever.
- First deep ring: path +4.7%, minor +12.8%, notable +47.1%. Path and minor cost 20 cores, notable 50.
- Second deep ring: path +5.4%, minor +14.8%, notable +54.2%. Path and minor cost 30, notable 80.
- Deep Field nodes add to the same stat totals as the Web.
Deep Field: cost and value per ring
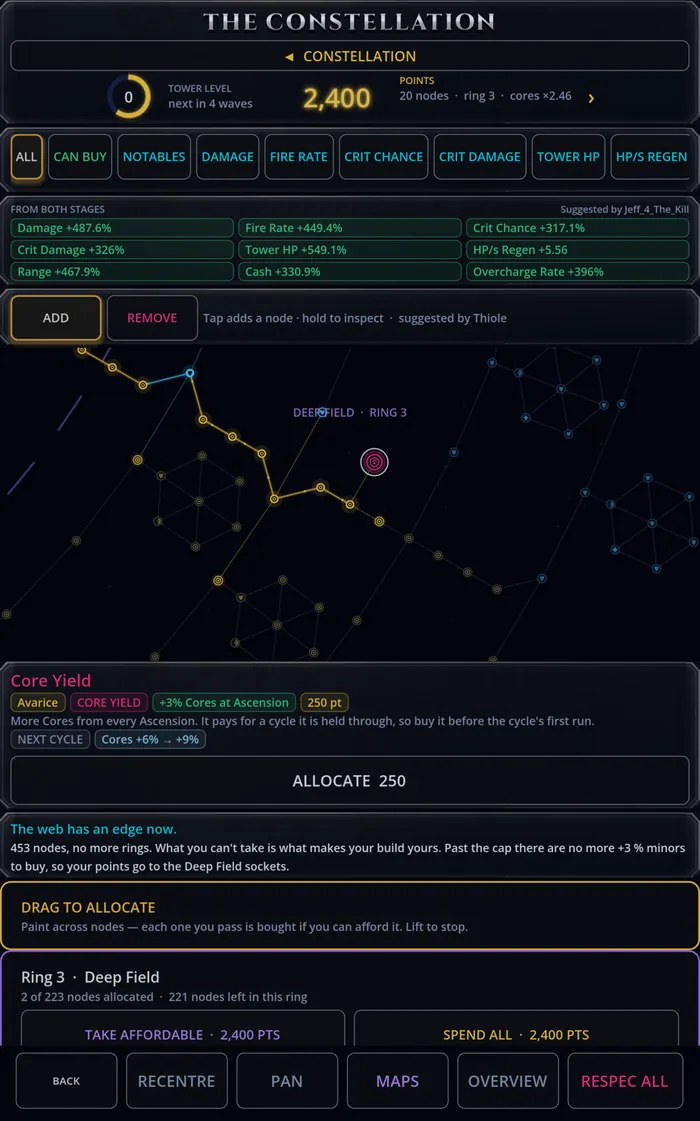
Core Yield. Each of the first 20 deep rings has one Core Yield node. Each one you hold adds +3% to the cores every Ascension pays (+60% for all twenty). It counts only for a cycle you held it through: buy it before that cycle's first run. The first one costs 100 cores.
Spending buttons on the ring card:
- FILL RING buys the rest of the ring you are on. It asks you to confirm if it would spend more than 250 points.
- TAKE AFFORDABLE replaces FILL RING when you cannot pay for the whole ring: it takes as much of the ring as your cores reach, cheapest first, keeping to nodes that connect.
- SPEND ALL buys every node you can reach anywhere in the Deep Field, cheapest first, until your cores run out.
- KEEP holds back part of your cores from SPEND ALL: none, 25%, 50% or an amount you type.
How deep you have reached also multiplies the cores each Ascension pays (see Cores).
Jewels
A jewel goes in a jewel socket you own. Its first affix is always a plain bonus; higher rarities add affixes that read the nodes around the socket.
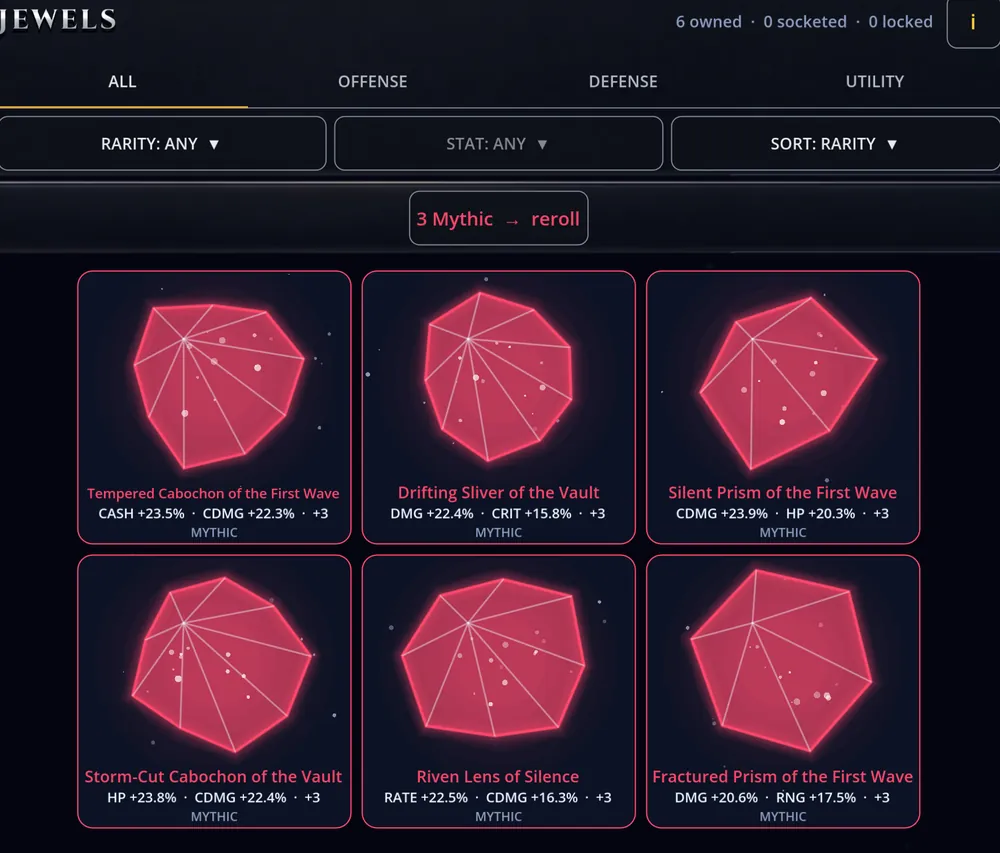
- Rarities: Common, Rare, Epic, Legendary, Mythic, with 1, 2, 3, 4 and 5 affixes.
- Radius: none for Common, then 190, 250, 320 and 380 units.
- Strength: ×1, ×1.35, ×1.8, ×2.4 and ×3.2, and each affix rolls between ×0.8 and ×1.25 of that.
The three kinds of affix:
- Flat: a plain bonus to one stat, 6% × strength. A Legendary's flat affix is +11.5% to +18%.
- Infuse: every node you own inside the radius grants an extra 0.9% × strength of one stat.
- Amplify: nodes you own of one kind (path, minor, notable, or minor and notable) inside the radius give 12% × strength more of what they already give. A Legendary always has one.
- Regen affixes are flat HP per second, at 6% of the percentage figure.
- Infuse and Amplify only count nodes on your map. Deep Field nodes are not inside any jewel's radius.
Where jewels come from: 0.07% of kills drop one, and 22% of boss kills, raised by Fortune. Deeper waves and higher sectors roll better rarities. Every Ascension also gives one to five, and the daily reward gives one on days 4 and 7.
- Fuse: three loose jewels of one rarity make one of the next rarity. Three Mythics make a fresh Mythic. Socketed and locked jewels are never used.
- The fuse bar on the Jewels screen always lists all five rarities, for example "FUSE 3 Legendary → 1 Mythic", with "you have N" on a rarity you cannot fuse yet. Tap a loose jewel and, when two more of its rarity are free, it offers FUSE ×3, which fuses that jewel with two others.
- Attune: try to raise a jewel one rarity for gems. From Common, Rare, Epic and Legendary the chance is 72%, 46%, 24% and 12.5%, for 30, 90, 260 and 700 gems. A failure destroys the jewel unless you also pay for a Safeguard (45, 140, 420 or 1,100 gems), which keeps the jewel but still uses up the attempt. Mythics cannot be attuned.
- Lock a jewel to protect it from fusing.
Cluster jewels
A cluster jewel is a separate item. Put in one of the Deep Field's three rim sockets, it unfolds into a small web of its own.
- Only three can be in use at once, one per socket. Every other cluster you own waits in your list, and you can swap at any time.
- Nodes: 6 for Common and Rare, 7 for Epic and Legendary, 8 for Mythic. One notable, the rest minors.
- Each node costs 1 core, the notable included. ALLOCATE ALL takes the whole cluster at once, and taking a cluster out of its socket gives the cores back.
- Each minor gives +3% of one of the jewel's own affix stats (a regen minor gives +0.18 HP/s). The stats come from the jewel; the size is a ring 1 minor's.
- The notable is Eye of the Storm: +11% Crit Chance, and one extra target. In 0.5.23 that extra target is added to the Cannon's target count, the same count Multi-Shot raises.
- Clusters drop beside a normal jewel drop, about as often as a Legendary jewel would. Before the Deep Field is open, the drop banner, the cluster's card, the jewels list and the Constellation's DEEP FIELD SOCKETS button say when the sockets open, with your node count.
- Fusing, upgrading or salvaging cluster jewels is not in the game yet.
How node bonuses combine
All of these feed one total per stat: Web nodes, Deep Field nodes, jewel affixes and allocated cluster nodes. The total turns into one multiplier, ×(1 + total ÷ 100), which then multiplies with everything outside the Constellation.
Example: 40 Damage nodes worth +500% in total, plus a jewel with +18% Damage, is +518% Damage: ×6.18. Adding the same +18% to a stat at +0% would be worth ×1.18 instead. The full rule is on Stats.